Set it up
Three short jobs. Keep the keyboard plugged in until Part 4 is done.
A · Put the software on the memory card
Download and open Raspberry Pi Imager. It's free.
Put the memory card in the card reader and plug it into your computer.
It's fine to wipe what's on the card.
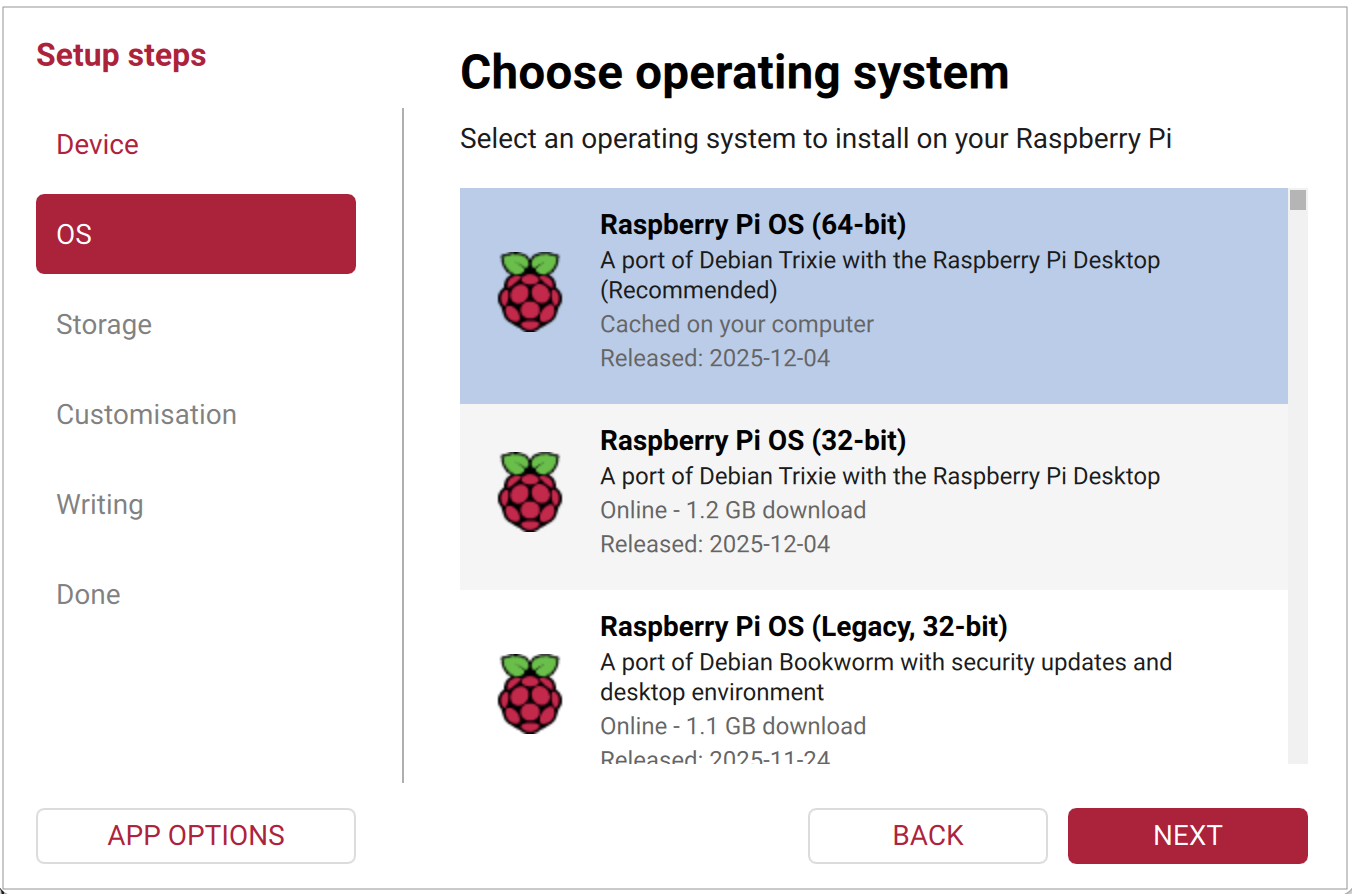
Choose Raspberry Pi 5 (or 4, if that's what you have), then Raspberry Pi OS (64-bit), then your card. Press Next after each.
The recommended one at the top. It must say 64-bit.
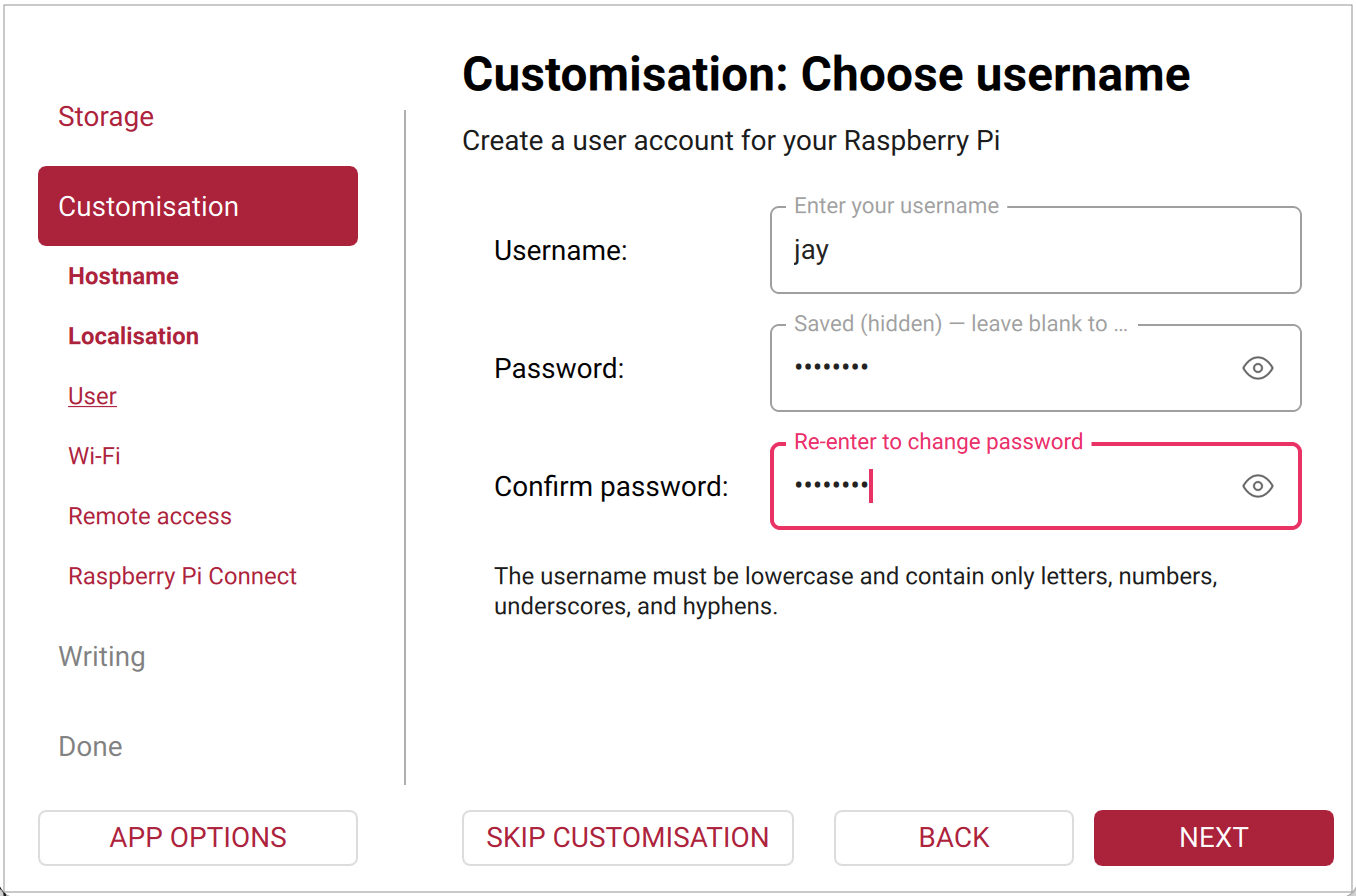
When it offers settings: pick a username and password (write them down), and type your Wi-Fi name and password. Press Next past anything else.
Confirm. When it says it's finished, take the card out.
B · Plug it in
Memory card into the slot underneath.
If you have the radio: screw the shortest rod onto the magnetic base, plug the base's cable into the radio stick, and put the stick in any USB socket. Stand the base near a window.
HDMI cable from the socket next to the power socket to the projector. Turn the projector on.
For today, point it at a wall. Any TV works too.
Keyboard and mouse. Power last.
The first start takes a couple of minutes. If a welcome screen appears, follow it: your country, a username and password (write them down), your Wi-Fi. It may restart once. You'll end up on a desktop.
C · Type one line
Open the : the black square icon in the bar at the top of the screen.
Type this line exactly, then press Enter:
curl -fsSL skylightceiling.com/install | bashThe | is Shift + the \ key, usually above Enter. Or open this page in the Pi's own web browser (the globe icon at the top), press Copy, then right-click in the Terminal and choose Paste.
If it asks for your password (it may not), type it and press Enter.
Nothing appears while you type. That's normal.
Wait. Lots of text scrolls by. When it restarts on its own, you'll see stars on the projector.
Until Part 4 it shows San Francisco's planes, not yours. Keep the keyboard for now.
What is that line doing?
It fetches a short script from this website that downloads Skylight, installs everything it needs, notices whether a radio is plugged in, names the Pi "skylight", and sets it to show Skylight full-screen every time it starts. The long version, if you'd rather see it:
git clone --branch release https://github.com/cpaczek/skylight.git ~/skylight || git -C ~/skylight pull --ff-only; cd ~/skylight && ./pi-setup/install-on-pi.sh && ./pi-setup/setup-kiosk.sh && sudo rebootSomething went wrong, or it stopped
Type the same line again. It picks up where it left off. Still stuck? See Help.
Rather have help with this part?
Paste this into ChatGPT or Claude and it will talk you through it:
I'm building Skylight, a projector that shows the real planes and stars above my house on my ceiling. Please read https://skylightceiling.com/llms.txt first, then walk me through it one step at a time. I'm not technical. Start by asking me what I already have. If you can't open links, say so and I'll paste the file.